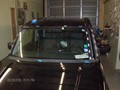
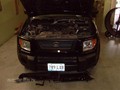
Honda Element 2010 Windshield Replacement
Slide show of a front
windshield replacement on a 2010 Honda Element 2010
using new top molding.
Please read more below show
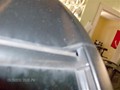
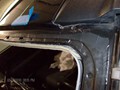
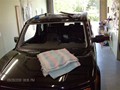
This 2009 Honda Elements
windshield had never been replaced yet there was rust
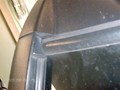
located at the top right corner. Also there was a slight
gap at the top corners where the A-pillar molding meet
the top moldings. These vehicles are prone to make wind
noise due to there upright box profile when traveling
at high speeds according to different forums that I
visited in the past. We first start off by marking the
location of the windshield wiper location with blue
tape along with the outer edge of the top molding. The
A-pillar molding must be removed and special care is
taken to reduce the amount of plastic clips that may
break during removal. Most people ask why should they
pay for something that we broke when removing these
moldings? Well they are made out of plastic and are
placed in a area that receives extreme temperature changes.
Keeping that in mind the plastic OE strength weakens
due to the fluctuation of temperature. On the Honda
Element these clips are held in place very securely
and take some effort to remove. Most of the time it
maybe only a few that break and should be replaced prior
to reinstalling the A-pillar molding.
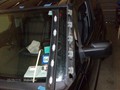
As you may notice in
this slide show we remove the wipers and cowling. The
cowling sits just under the windshield wipers and above
the windshield. It is almost always best to remove the
cowl especially in the Honda Element for a cleaner removal
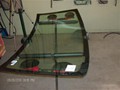
and replacement. Next the black rubber molding along
the top is removed from the old windshield and discarded.
The molding on this car has an adhesive that will separate
off the windshield once removed. Used tape will not
adhere with the same adhesive properties as meant by
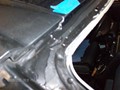
the manufacture. Next the pinchweld around the windshield
is dusted, the windshield is removed using professional
auto glass tools and placed on a windshield stand.
The area where the auto
glass is bonded to the vehicle is cleaned again with
filtered water, then dried and trimmed down to 1-2mm
thin using the Full Cut Method. Any area that may have
been nicked or scratch is then primed with Adco UP100
Pinchweld Primer to help prevent future rust from forming.
While waiting for the primer to flash or dry for 10
minutes, the new windshield is prepared for replacement.
The new windshield is cleaned, new molding is installed,
all stickers are transferred and two suction cups are
placed on the windshield.
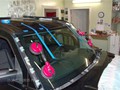
The new seal is Adco
Titan Pro 1 is placed directly onto the new windshield
having only one continuous bead and a single joint.
The sealant is placed by using a Triangle Shape Bead
and a power gun for better consistency of placement
onto the new windshield. We use two people with suction
cups to place the windshield onto the body of the vehicle
for better placement.
Thanks for watching our slide show.
|